Bifurcation diagram of the logistic map [online version]

One of the reasons why mathematics is so amazing is that even a simple at first glance concepts have interesting behaviors and features. I think that the bifurcation diagram of the logistic map is a great example.

The logistic map is given by the equitation:

xn+1 = rxn(1 - xn), x0 < 1, r ∈ (0,4]

Below you may generate its bifurcation diagrams for different ranges and for different values of the x0. It's amazing that those diagrams have fractal nature - self-similarity is even visible at first glance.

X-axis represents values for different r values, Y-axis represents x0...n element value, n < 90 because in real world we can't show elements ad infinimum.

rstart>0: rstop≤4: x0<1:

The script was originally created a couple of years ago, so it may not be aligned with the modern JavaScript way of doing things. If you are interested how it works, please take a look on the source code of this page.

5V/400V DC/DC converter

A small and cheap 5V/400V DC/DC converter can be useful in many DIY projects, e.g Geiger–Müller counters. I will present here one of such DC/DC converter based on popular MC34063 chip in step-up configuration.

One big limitation of this device is little output power, but for many applications this won't be a problem. Another problem is poor temperature stability, but this could probably be improved by using low tolerance C1, R7-R11.

Q1, L1, D2 are coil-based step-up converter. Q1 should be a power MOSFET rated a bit more than the output voltage. Empirical tests have shown that Q1 didn't heat up, so I didn't mount it on a radiator. D2 and C4 rectifie output voltage, they also should be rated for bigger voltage than the output. To improve performance, D2 can be replaced by a Schottky diode, capacitance C4 can be increased. R3-R11, C3 provide output feedback to the MC34063. S1 is used to select output voltage if needed.

Idle power consumption is 85mW. Below presented fluctuation in output voltage at constant temperature and constant load.

Unfortunately, the device output voltage highly depends on room temperature, the lower the temperature, the higher is output voltage. Example of this is visible on below picture. Temperature measured near the transistor. Negative spike of temperature visible on the picture was created using canned air spray - easy way to temporary decrease temperature. The picture was generated using set of scripts that I presented in one of my posts.

Such high output voltage can be dangerous (even while the maximum curent iof this converter s small), so if you make the same or similar device, please be careful. If you are interested in higher voltage, you ma take a look on High voltage supply (10-30kV) made from CRT television flyback transformer.

Eagle files for this project can be downloaded from my GitHub repository.

DP-70 dosimeter

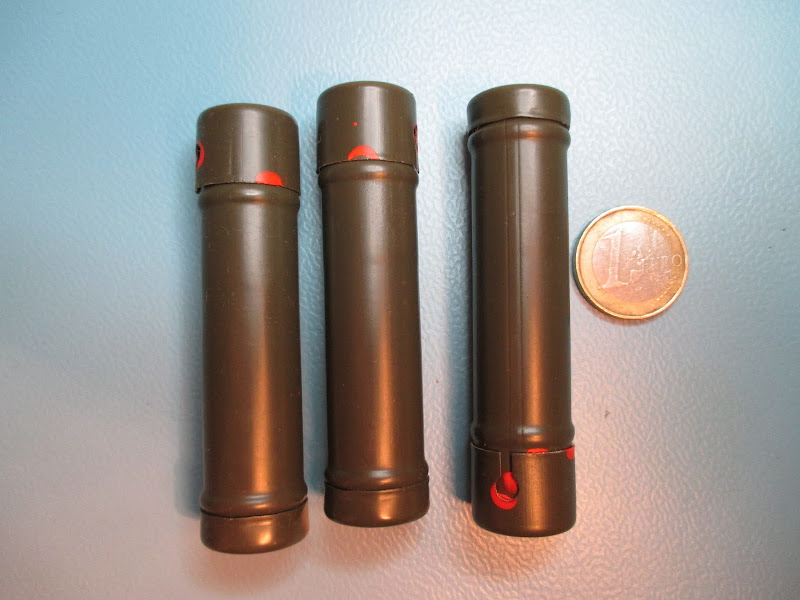
DP-70 was a chemical dosimeter used in the Polish army during the Cold War. A dosimeter is a device used to measure the amount of radioactive radiation absorbed by a body, in this case, by soldiers.

DP-70 dosimeter

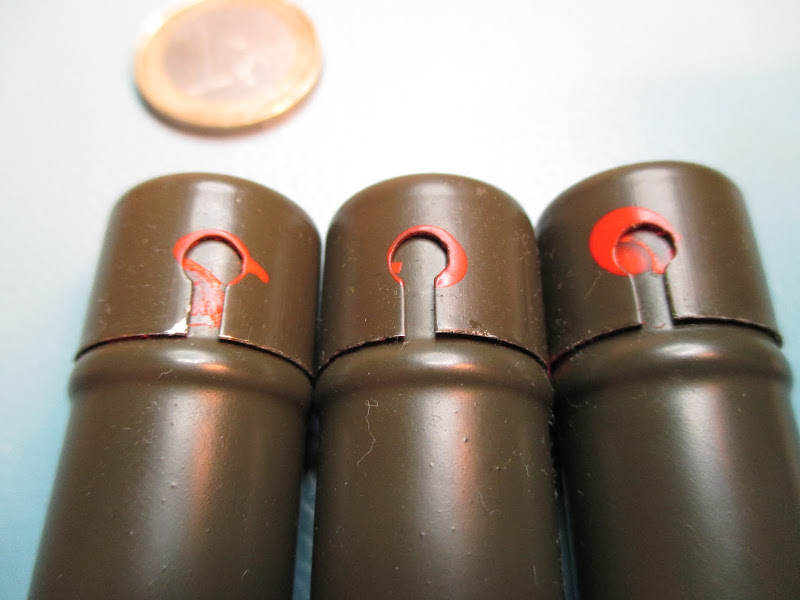
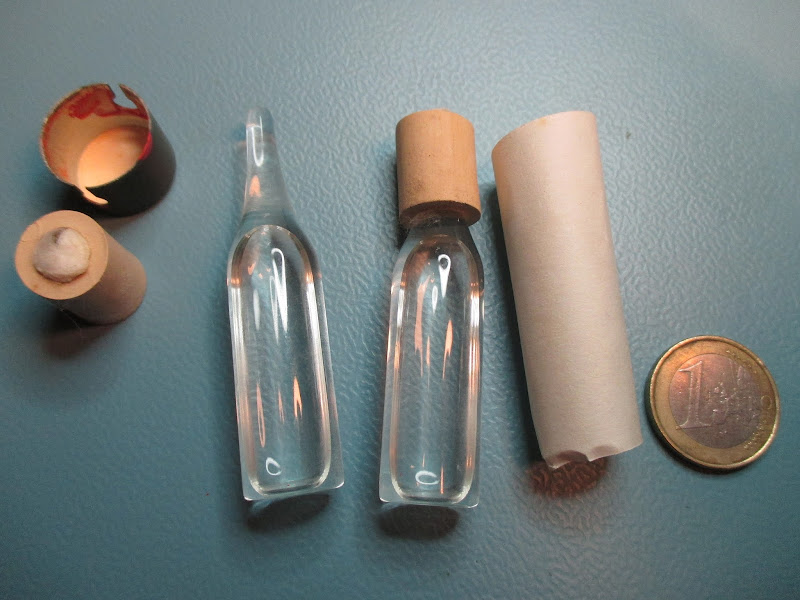
DP-70 has a form of a small metal cylinder (to protect the device in hard, combat conditions) that covers an ampule with a transparent liquid. This substance change color proportionally to absorbed radioactive radiation.

DP-70 dosimeter

It's a simple device, but has two major drawbacks - it can't be used by colorblind persons and is not precise. Due to those two factors, the device was replaced by more modern DKP-50 dosimeter.

DP-70 dosimeter DP-70 dosimeter DP-70 dosimeter

It can be bought for around two euro, unfortunately it's designed to measure ranges present during nuclear war, so it's far too insensitive to make any experiments with environmental radioactivity.

Extracting potassium (with its radioisotope) from cigarette ashes

Organisms are built mainly of carbon, hydrogen and oxygen, but they use many more chemical elements, one of them is potassium. After burning of organic matter, potassium stays in ashes as oxide that later is transformed to hydroxide. In the environment, potassium exists in a mixture of three isotopes: 93.3% of 39 K, 6,7% of 41 K, and 0,012% of radioisotope 40 K. The amount of mentioned 40 K radioisotope is really tinny, but sufficient to be detected using home methods.

In this post I will present a simple method to extract potassium compounds from ashes. Purity of the end product is low, from what I found online, for wood ashes, it's around 20-30%.

What is needed? Cigarette ash (for this experiment I used remains of 192 cigarettes - I'm a smoker!), water (can be tap water), stove, pot, two beakers (or jars), funnel, cotton, stirrer (or spoon). The whole process takes a couple of hours.

I've started from removing cigarette buts, matches, and other junks, the result was ~130ml of ashes.

Breadboard made from scrap electronics

A simple but useful breadboard can be made at home, it will be more expensive than those on the markets, but it's possible to add commonly used elements, like LEDs, switches, etc.

I hadn't had female sockets, so I cut in half old DIP-18 sockets - it works OK.

The bottom layer was coated with Lichtenberg's alloy - it's an easy and elegant way to protect traces from dust, humidity or oxidation.

The circuit looks like a monster, but there isn't a lot of logic - only sockets, and a couple of LEDs - I didn't want to add more components, at least in this version.

You can download Eagle files for this project from by GitHub.

USB li-ion battery charger

Li-ion cells become more and more popular due to their capacity and reasonable prices. In this entry I will show how to build a simple li-ion battery charger based on MCP73831 chip. It's a quite useful device for DYI projects,in addition its cost is only around 1,5 euro.

The device uses USB port as a power supply (mini-USB connector). I use the standard gold-pins as an output socket. There're three of them, but only two are used (looking on the image, counting from top: V+, V-). I will design my li-ion based devices in the same way (same socket, but female), then if I will connect it in the incorrect direction (rotated 180 degrees) they won't be damaged (V- connected to V-, but V+ connected to n/c pin) - simple way to avoid plugging in an incorrect way.

LED indicates if battery charging is in progress.

Pay attention to connection polarity, li-ion batteries can burn or explode if connected incorrectly. Never leave battery unattended while charging is in progress.

The PCB could be smaller, but it's made in this shape according to chip's documentation, additional copper space is used to dispatch heat produced during charging. The documentation mentioned 2-side layout, but I used only one side. The copper was coated by using Lichtenberg's alloy, so heat dispersion is improved - it seems that it's enough.

Eagle files can be downloaded from my GitHub.

That's all, I will use this for my . I will also have to thing about some DC/DC converter for them (to obtain 5V from li-ion battery), but that's a different story.